
Classes
Mortal Shell 2 Shells
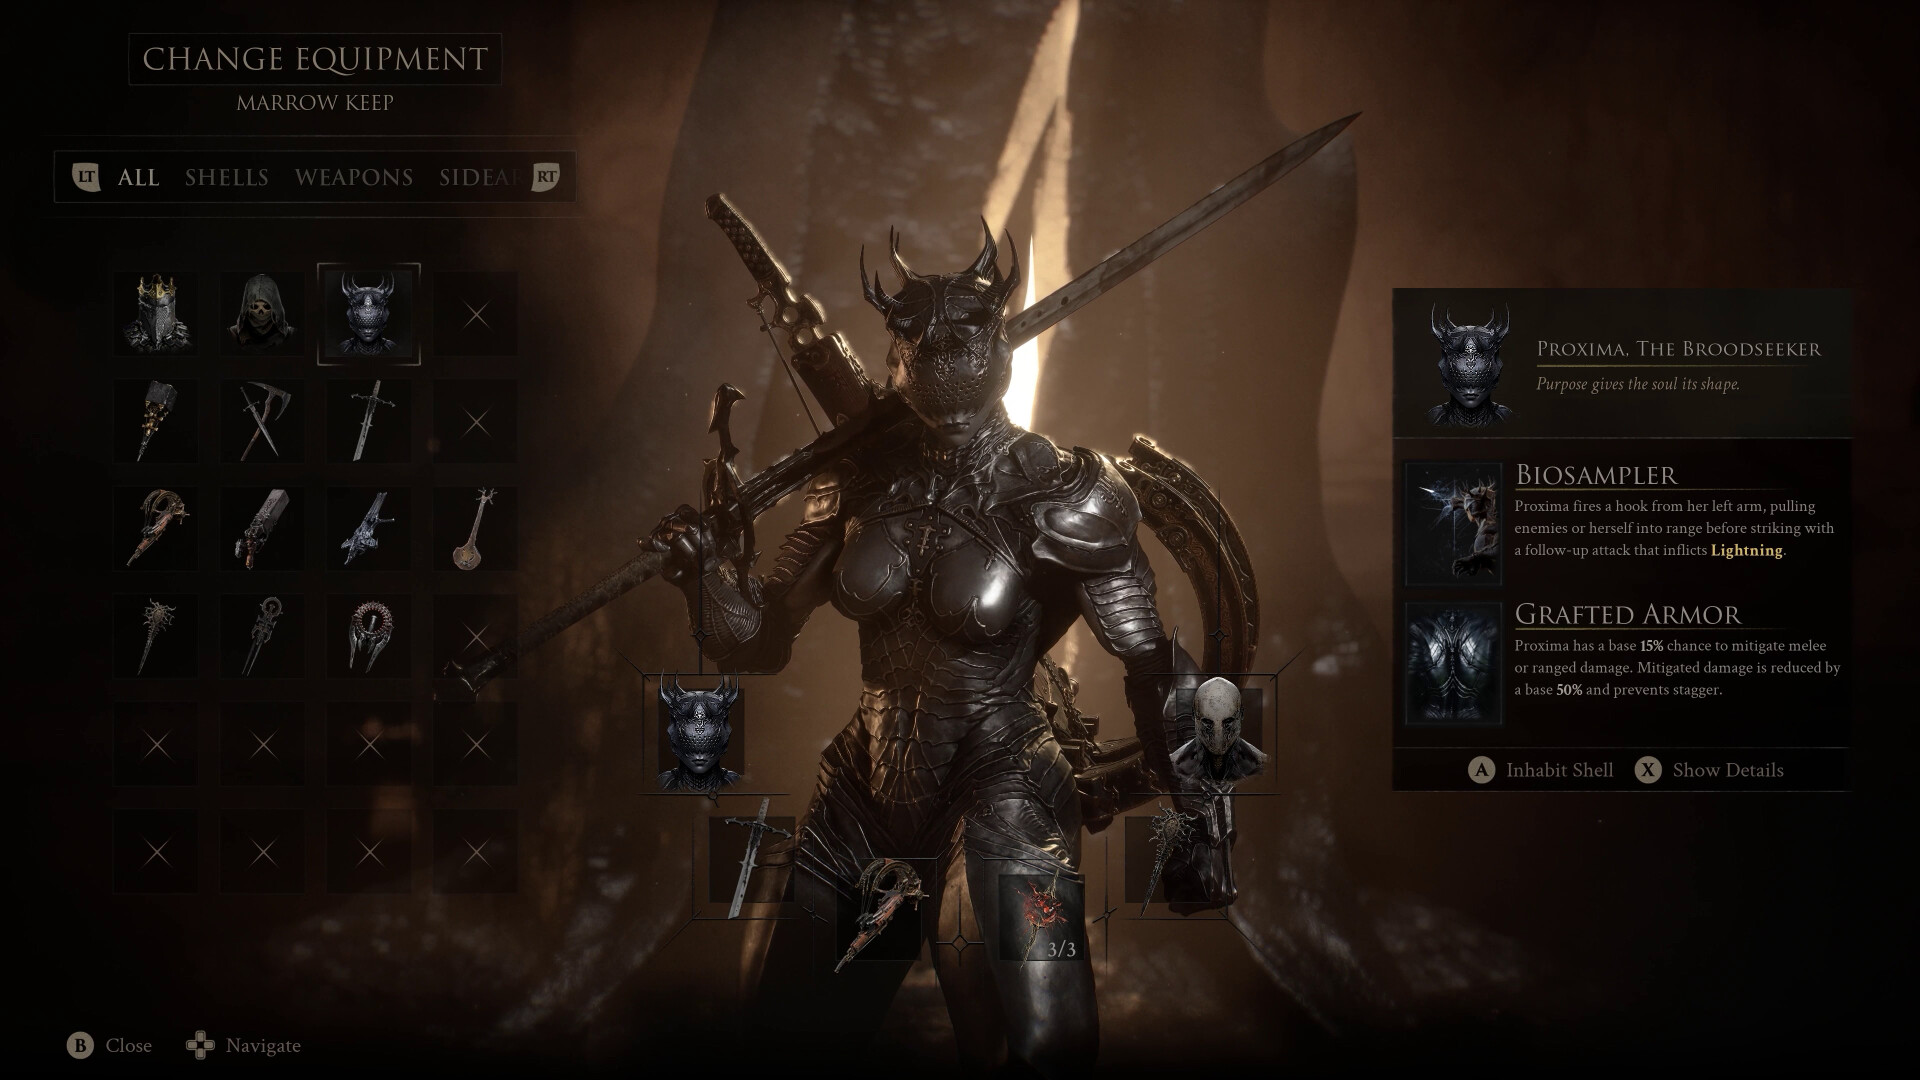
Shells are Mortal Shell II's answer to classes: the forgotten bodies of eight lost warriors, scattered across the world, each one waiting to be possessed and mastered. This page collects everything officially confirmed about them so far.
Fact-checked against the official Steam page and the developer's website on August 17, 2026; the three player-question FAQs below (Harros, Genessa's shade, Lazlo's heat) were added September 4, 2026 from the Steam discussion threads linked in the sources, and the September 5 shell-balance section was added September 9, 2026 from Playstack's official update notes and the post-patch Steam threads.
The eight shells, named
The launch build's eight possessable shells are Tiel, Proxima, Eredrim, Gragu, Smert, Sester Genessa, Lazlo, and Sariel. A ninth figure, Harros, appears as the vassal who helps you during the prologue — he is not counted among the eight lost warriors your Harbinger ultimately inhabits.
Two of the shells, Gragu and Sester Genessa, are first encountered as living NPCs rather than corpses — Gragu drinking at the One Legged Wolf Tavern, Genessa running combat training in Marrow Keep. The rest are found out in the world, usually behind a boss fight or a ritual.
Can you save Harros or keep his shell?
No. Players hoping to preserve him get a firm answer in the Steam discussions (September 2026): Harros dies as part of the story, and there is no way to save him or claim his body. He is the vassal who fights beside you in the prologue, not one of the eight lost warriors listed above — no dialogue choice or hidden step turns him into a playable shell.
How to unlock every shell
Tiel and Proxima are the easiest: both general locations are revealed when you first enter Fainweald. Every other shell hides in a specific corner of the world, and several guard their bodies with a boss.
- Tiel — his gravestone east of Mushroom Village, inside a torch-lit fenced enclosure
- Proxima — the Shattered Beacon in the Blackridge Cliffs, north of Widow's Overlook
- Eredrim — defeat the Warden in the central arena of the Citadel of Penance (western Fainweald)
- Gragu — bring him the Heart of Vatra from the Temple of Vatra; he dies and leaves his shell at the One Legged Wolf Tavern
- Smert — interrupt the blood ritual over his body in Prophet's Rest, near the Outskirts of Nochte
- Sester Genessa — win the censer from Sester Secondus in the Revenant Graves and return it to her in Marrow Keep
- Lazlo — defeat Vellen, High Lord of Mammon, in the Royal Crypt of Mammon
- Sariel — beat Sariel the Endless in his boss encounters: first in the white ruins of southern Mammon, then inside the Chamber of Becoming
Tiel and Proxima: the Fainweald pair
Tiel is the gentlest unlock of the eight. His general location is revealed the moment you first enter Fainweald; Rock Paper Shotgun's location guide describes the walk — from Mushroom Village keep heading east to a torch-lit fenced enclosure, where Tiel's gravestone waits inside on the left. Interact with it and the shadow-specialist shell is yours.
Proxima sits a screen north: from the Widow's Overlook Beacon head into the Blackridge Cliffs, past cultists fighting a Tarred Vestige and the white spider-like enemy, until a glimmering beacon appears — the Shattered Beacon. Her body lies on a table inside, and possessing her unlocks the Biosampler kit that lightning builds are built on.
Gragu and Sester Genessa: the living NPCs
Gragu drinks at the One Legged Wolf Tavern long before you can wear him. To claim his shell you need the Heart of Vatra, found on a vampire-infested mountain pass northeast of the tavern: infiltrate the Temple of Vatra past petrified cultists who wake and attack, carry the heart back, and Gragu dies content — leaving his shell behind. The tavern is also where you pick up the Troubadour's Lute.
Sester Genessa is the training NPC in Marrow Keep, and talking to her enough times hints at her side quest. The censer she wants sits in the Revenant Graves — the red-tree area past the Sester's Refuge in the eastern Ruins of Mammon. Interact with the glowing red censer to draw out Sester Secondus, defeat her, and return the prize to Genessa.
Why doesn't my Shell Shade show on Sester Genessa's second form?
Shell Shades applied to Sester Genessa do not carry over to her Stray second form. Several players confirmed this in the Steam discussions (September 2026) and read it as design behavior rather than a bug — one regretted spending a Blackmarrow key on the shade for exactly that reason. Note this is separate from the display bug that stopped some Devout and Pre-Order Shell Shades from appearing at all; that one was fixed by the September 1 PC hotfix (see the patch notes), while the second-form behavior stands.
Eredrim, Smert, Lazlo: the guarded bodies
Eredrim is the knight waiting in the Citadel of Penance, the heavily patrolled keep of western Fainweald. From the citadel's own beacon, drop from the courtyard into the pit, follow the circular lower passage past burstable eggs until you spot the lift near the air current, and ride it into the central arena — the Warden who killed Eredrim long ago is the price of the shell.
Smert's ritual is the strangest sight of the eight. From the Outskirts of Nochte Beacon turn left up the slope into Prophet's Rest: three cultist groups chant over circular pits of red liquid, with Smert's body on a stone slab beside them. Clear the three groups (RPS notes the Troubadour's Lute can turn them on each other) and the screen glows red when the shell is claimable.
Lazlo lies in the Royal Crypt of Mammon behind Vellen, High Lord of Mammon. From the High Lord's Courtyard Beacon ride the air current up, dodge the rolling Knight of Mammon on the way down into the dark crypt, and put Vellen down — Lazlo's body is in the chamber just beyond.
Does Lazlo's heat bar drain once it's full?
No — once Lazlo's heat gauge fills it stops draining and stays at full until you re-use his ability, per the players who answered exactly this question in the Steam discussions (a five-reply thread from late August 2026). The replies read the behavior as intended, and it is the backbone of the common passive Lazlo setup: reach max heat, leave the ability alone, and build around the shell while its gauge stays pinned. For how that pairs with weapons, sidearms, and seals, see the best build guide.
Sariel: the shell you fight for
Sariel is the only shell you earn entirely through boss encounters. He first challenges you at the brutalist structure in the far south of Mammon, near The Silent Steps Beacon — RPS's writer even knocked him off the edge seconds into the fight. It doesn't end there: he retreats through the walls into the dungeon behind the massive statue, leading to the Chamber of Becoming. Break the stones in the final room so he can't keep reviving, and the Endless is finally yours.
What each shell is known for
Every shell carries its own ability tree and passive identity. Tiel's specialty is disappearing into the shadows; Smert wields time-stopping powers. For how those abilities turn into combat builds — which weapon, sidearm, and seal to pair with each shell — see the Mortal Shell 2 best build guide.
Shells also hold their own memories: unravelling them unlocks each shell's innate abilities and reveals their personal stories. Playing a shell well and digging into its secrets is how you develop its full kit — and the weapon you pair with it decides the rest. The full arsenal is catalogued in the weapons guide, and the bosses that guard several shells are listed in the boss guide.
Balance Patch 1 and shell pairings
Playstack's Balance Patch 1 (August 20, 2026) reshuffles the weapon half of every shell pairing. The Great Martyr's Blade — Proxima's signature heavy option in our best build guide — gained +20% attack damage, and the Troubadour's Lute doubled its attack damage outright (+100%). Neither buff changes which shell you enjoy playing, but both change which weapon deserves your first Tarforge investment once you have claimed a body — and the patch cut Tarforge smelting costs by 75%, so swapping weapons between shells is far cheaper than it was at launch.
The patch also touches how you hunt shells in the first place: shell map locations now cost Gloom instead of Glimpse, with refunded Glimpses waiting in the Shell Keeper's alcove in Blackmarrow. A Seals note applies to every shell's defensive kit too — Guard can now be used while walking. For the full weapon-by-weapon breakdown, see the weapons guide.
Sariel and Genessa after the September 5 update
Playstack's September 5 update (the "New Update Out Now" patch) is the first patch to re-balance two of the eight shells directly. Sariel took the buff: his Thornfall now works in enclosed spaces, prioritises the enemy you have locked on, and hits moving targets; Agonize no longer requires you to be at full pain; and Affliction now shares its damage and spreads curse to enemies that are not cursed yet — per the official notes, a straight upgrade to his damage-over-time playstyle. Sester Genessa took the nerf: her Augmentation no longer grants infinite resolve or infinite Faithful Doubles, closing out the infinite-clone engine that some launch builds were built around.
The nerf has thrown errors of its own, per the first post-patch reports on Steam's Bug Reports board (September 8 — player-reported, unverified, one thread each): Faithful Doubles reportedly lose their AI and despawn after a single strike instead of three while the Grisha Remnant is equipped, returning to normal once the item comes off; Wandering Doppelgangers reportedly vanish immediately after going airborne or securing a kill; one player measuring the +20% clone-duration perk got 33 seconds where 36 were expected alongside the +8-second perk; and one Genessa player reports new post-patch crashes while playing the shell. Until a hotfix or patch note says what is intended, treat Genessa's clone kit as in flux — her shell unlock and censer quest above are unaffected. The patch notes page tracks when that changes.
Which shell is the best class in Mortal Shell 2?
There is no official best shell — each of the eight pairs a unique ability kit with a different playstyle, so the honest answer is which kit matches how you fight. Two practical starting points: Tiel and Proxima are the earliest shells you can possess (both are revealed when you first enter Fainweald), and the community's launch-build consensus pairs every shell with its own weapon, sidearm, and seal rather than crowning one class above the rest.
If you want a place to start: Proxima's Lightning burst kit and Smert's Chaos Miracle setup each have a full deep-dive — the best Proxima build and the best Smert build — and all eight pairings are compared in the best build guide.